As a DevOps engineer, i've delved into tools like Minikube and Kind for local development, appreciating their simplicity.
Yet, they obscure cluster configuration intricacies.
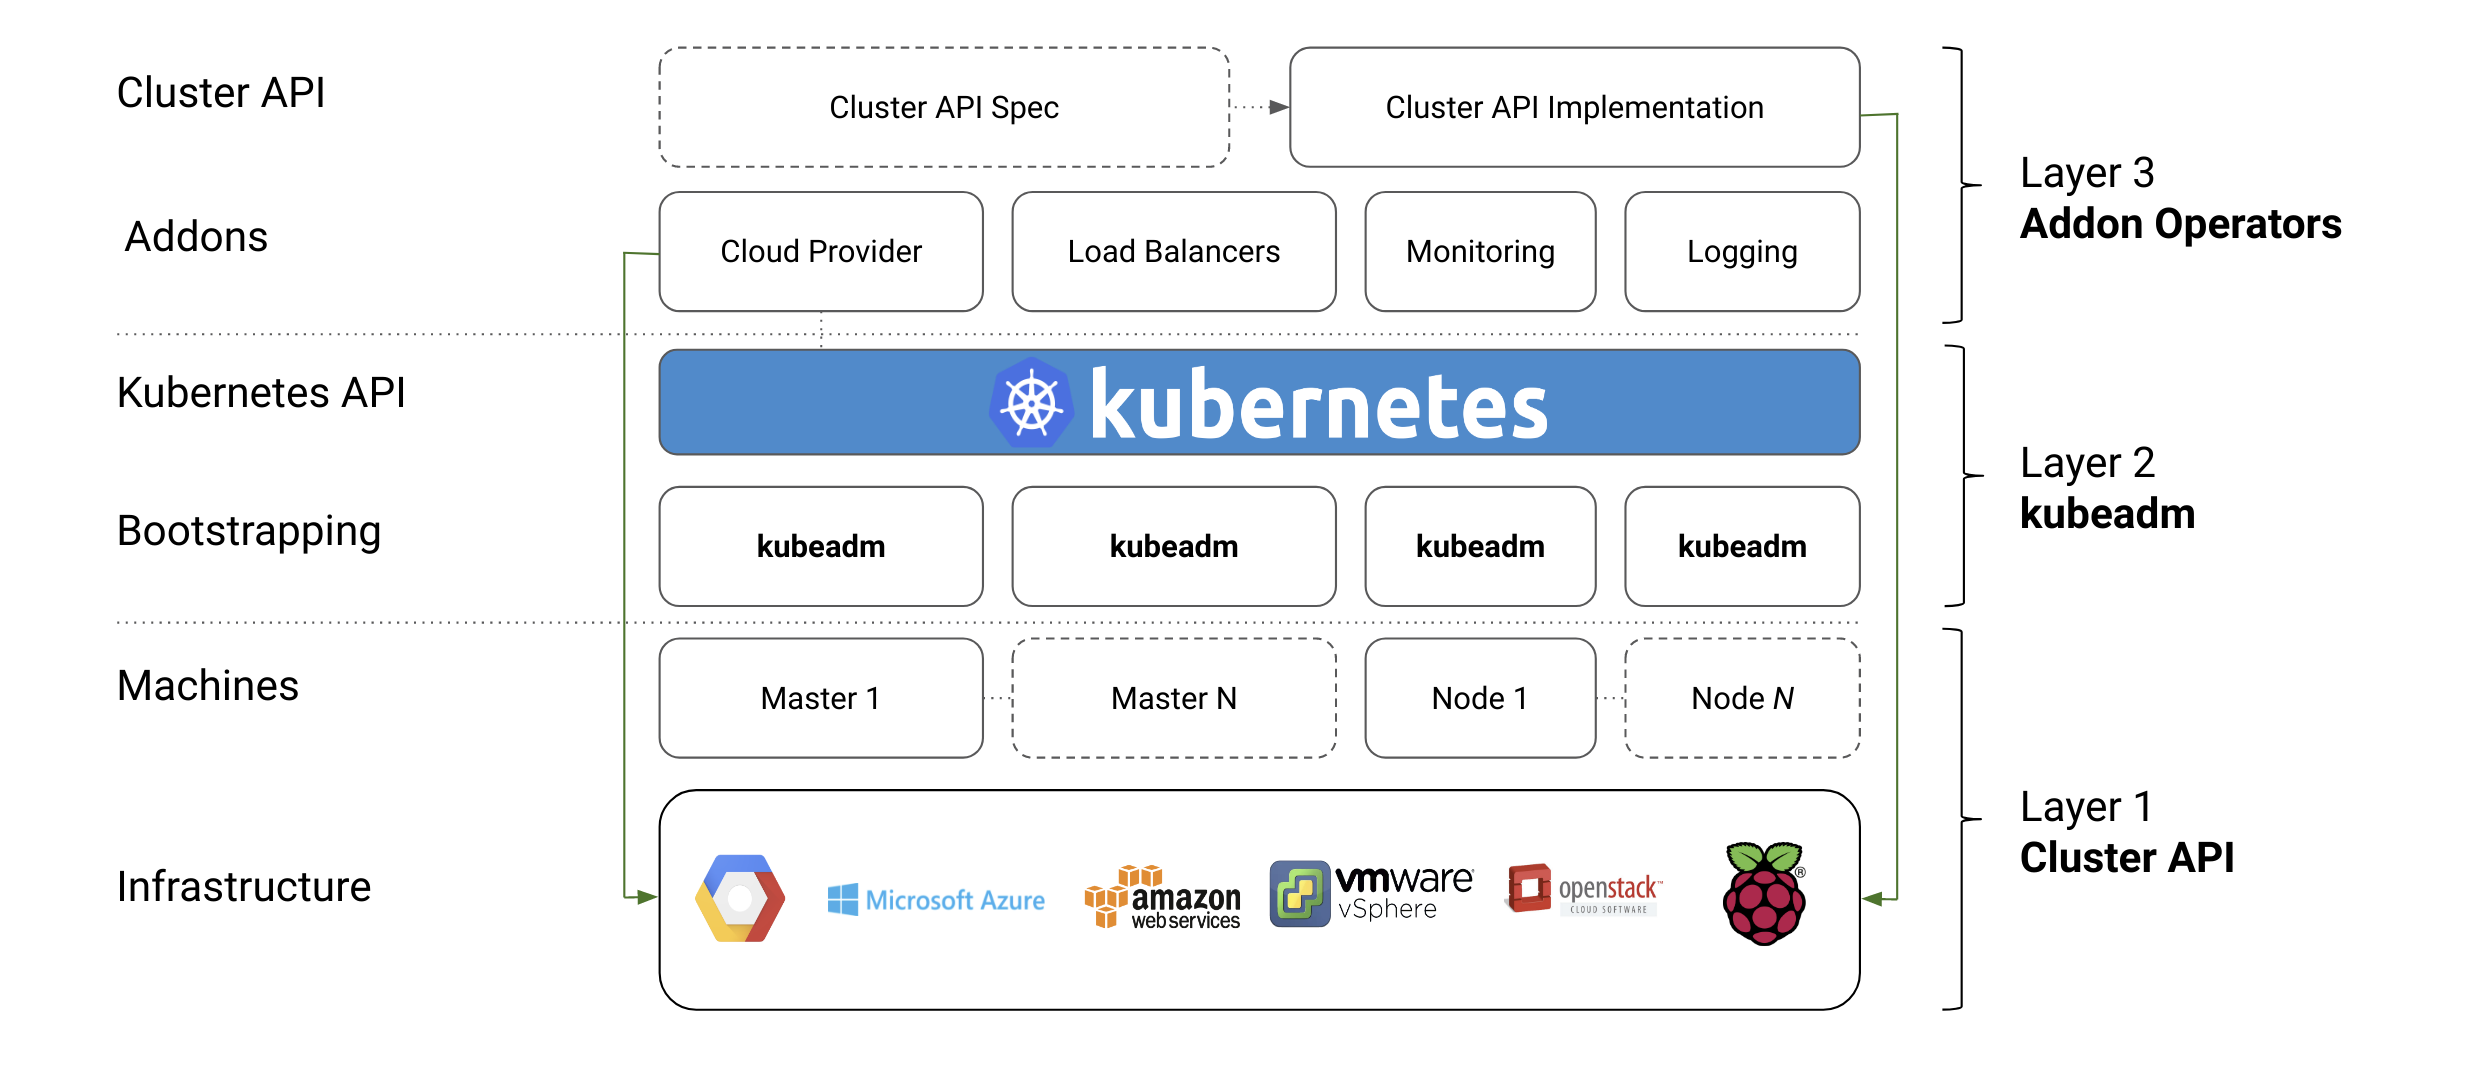
Understanding Kubernetes components is crucial. Thus, I've embraced Kubeadm, which allows setting up complete Kubernetes clusters from scratch, enhancing my expertise.
What is Kubeadm?

Kubeadm is a tool that helps you bootstrap a minimum viable Kubernetes cluster that conforms to best practices. It is designed to be a composable, secure, and portable bootstrap mechanism for Kubernetes. It is a part of the Kubernetes project and it's used in conjunction with kubectl.
Why Kubeadm?
Kubeadm is a powerful tool that allows you to create a multi-node Kubernetes cluster from scratch. It is a great way to learn the intricacies of Kubernetes and understand how the various components work together. It is also used to set up production environment.
Pre-requisites for this guide:
host machine requirements:
- Ubuntu server 22.04 LTS.
- 16GB of RAM.
- 8-core/4-core hyperthreaded or better CPU, e.g. Core-i7/Core-i9 (will be slow otherwise).
- 100GB of free disk space.
- Vargant and VirtualBox installed.
VMs requirements:
- 1 Ubuntu 22.04 LTS VM with 2 CPU, 2GB RAM, and 20GB storage.
- 2 Ubuntu 22.04 LTS VMs with 1 CPU, 1GB RAM, and 20GB storage.
Deploy 3 VMs - 1 Control Plane, 2 Worker. (All VMs are Ubuntu 22.04).
The network that i used in Virtual Box virtual machines is 192.168.11.0/24
here is an example of the VMs configuration (it can be different based on your assigned IP addresses but it should be in the same network, in my case it's "192.168.11"):
| VM Name | Purpose | IP | CPU | RAM |
|---|---|---|---|---|
| controlplane | Control Plane | 192.168.11.102 | 2 | 2GB |
| node01 | Worker | 192.168.11.103 | 1 | 1GB |
| node02 | Worker | 192.168.11.104 | 1 | 1GB |
These are the default settings for the setup that i used in this demo. if your are going to use multipass, you can find a script to create VMs in the
vmsfolder.
Node Setup:
NOTE:
In this section we will configure the nodes and install prerequisites such as the container runtime (containerd).
Perform all the following steps on each of controlplane, node01 and node02.
STEPS:
1. Update the apt package index and install packages needed to use the Kubernetes apt repository:
sudo apt-get update
sudo apt-get install -y apt-transport-https ca-certificates curl
2. Set up the required kernel modules and make them persistent:
cat <<EOF | sudo tee /etc/modules-load.d/k8s.conf
overlay
br_netfilter
EOF

sudo modprobe overlay
sudo modprobe br_netfilter
3. Set the required kernel parameters and make them persistent:
cat <<EOF | sudo tee /etc/sysctl.d/k8s.conf
net.bridge.bridge-nf-call-iptables  = 1
net.bridge.bridge-nf-call-ip6tables = 1
net.ipv4.ip_forward                 = 1
EOF

sudo sysctl --system
4. Install containerd as the container runtime:
sudo apt-get install -y containerd5. Configure containerd (Configure the container runtime to use systemd Cgroups.):
sudo mkdir -p /etc/containerd
containerd config default | sed 's/SystemdCgroup = false/SystemdCgroup = true/' | sudo tee /etc/containerd/config.toml
6. Restart containerd:
sudo systemctl restart containerd7. Determine latest version of Kubernetes and store in a shell variable, then download the Kubernetes public signing key, and add it to apt repository:
KUBE_LATEST=$(curl -L -s https://dl.k8s.io/release/stable.txt | awk 'BEGIN { FS="." } { printf "%s.%s", $1, $2 }')
sudo mkdir -p /etc/apt/keyrings
curl -fsSL https://pkgs.k8s.io/core:/stable:/${KUBE_LATEST}/deb/Release.key | sudo gpg --dearmor -o /etc/apt/keyrings/kubernetes-apt-keyring.gpg
echo "deb [signed-by=/etc/apt/keyrings/kubernetes-apt-keyring.gpg] https://pkgs.k8s.io/core:/stable:/${KUBE_LATEST}/deb/ /" | sudo tee /etc/apt/sources.list.d/kubernetes.list
8. Update the apt package index, install kubelet, kubeadm and kubectl, and hold them at the current version:
sudo apt-get update
sudo apt-get install -y kubelet kubeadm kubectl
sudo apt-mark hold kubelet kubeadm kubectl
9. Configure crictl in case we need it to examine running containers:
sudo crictl config \
    --set runtime-endpoint=unix:///run/containerd/containerd.sock \
    --set image-endpoint=unix:///run/containerd/containerd.sock
10. Prepare extra arguments for kubelet such that when it starts, it listens on the VM's primary network address and not any NAT one that may be present.
cat <<EOF | sudo tee /etc/default/kubelet
KUBELET_EXTRA_ARGS='--node-ip ${PRIMARY_IP}'
EOF
Control Plane Setup:
NOTE:
In this section we will configure the control plane node and initialize the cluster.
The following steps should be performed on the controlplane node only.
STEPS:
1. Set shell variables for the pod and service network CIDRs.
POD_CIDR=10.244.0.0/16
SERVICE_CIDR=10.96.0.0/16
2. Initialize the control plane node using kubeadm.the following command will also print out a kubeadm join command at the end that you will use to join the worker nodes to the cluster (save the generated command for later use in step ):
sudo kubeadm init --pod-network-cidr $POD_CIDR --service-cidr $SERVICE_CIDR --apiserver-advertise-address $PRIMARY_IP3. Set up the kubeconfig file for the current user:
mkdir ~/.kube
sudo cp /etc/kubernetes/admin.conf ~/.kube/config
sudo chown $(id -u):$(id -g) ~/.kube/config
sudo chmod 600 ~/.kube/config
Verify:
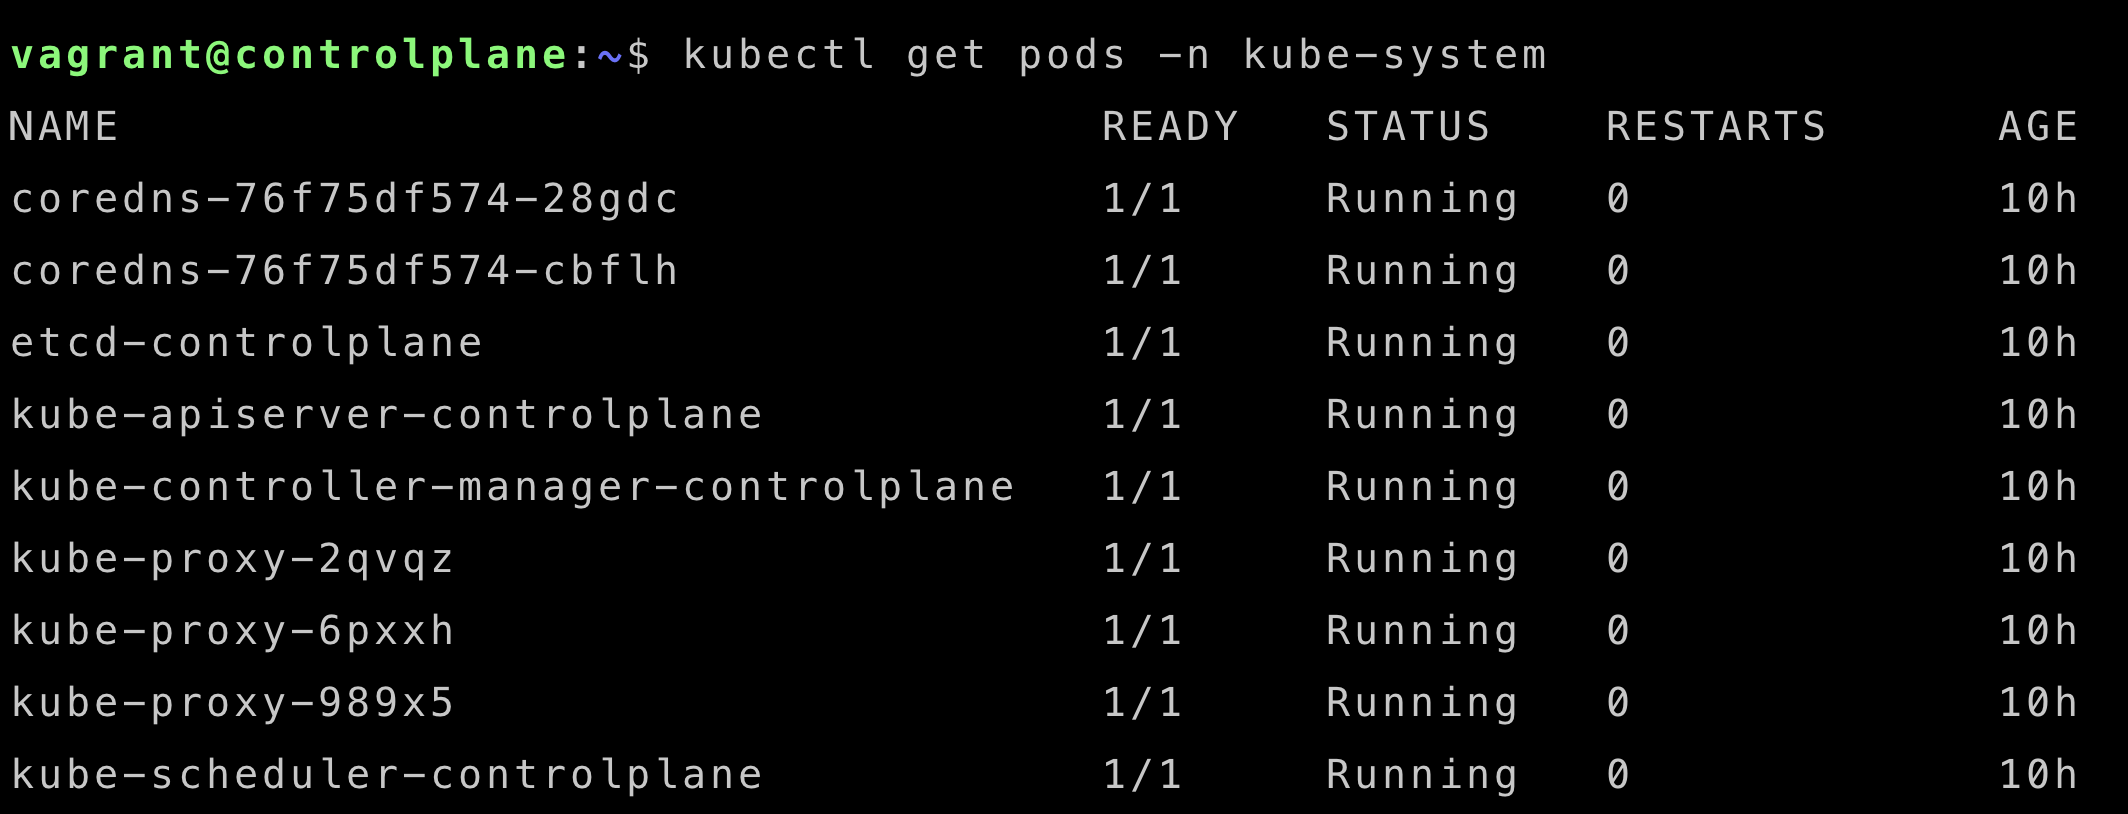
kubectl get pods -n kube-systemYou should see a similar output as shown bellow:

4. Install Weave networking (CNI plugin):
kubectl apply -f "https://github.com/weaveworks/weave/releases/download/v2.8.1/weave-daemonset-k8s-1.11.yaml"Verify that the control plane node is ready:
kubectl get nodes
watch kubectl get pods -A # after a few minutes you should see all the pods are running.
#Then you can stop the watch command. use ctrl+c
Join Worker Nodes:
Here we will join the worker nodes to the cluster.
Perform the following steps on each of the worker nodes (node01 and node02).
Incase you lost the join command, you can get it from the controlplane node by running the following command: (on controlplane node!)
kubeadm token create --print-join-commandafter retreiving the join Command, on each of node01 and node02 do the following.
- Become root (if you are not already):
sudo -iPaste the kubeadm join command output by kubeadm init on the control plane. and finally, verify that the worker nodes are ready (run the following command on the controlplane node):
kubectl get nodesyou should see a similar output as shown bellow (Notice that all the nodes are ready):

Testing:
Now that the cluster is up and running, you can test it by deploying a sample application.
Here is an example of a simple deployment:
create and edite a file called nginx-deployment.yaml.
vim nginx-deployment.yamlSave the bellow yaml in it.
apiVersion: apps/v1
kind: Deployment
metadata:
  name: nginx-deployment
  labels:
    app: nginx
spec:
  replicas: 3
  selector:
    matchLabels:
      app: nginx
  template:
    metadata:
      labels:
        app: nginx
    spec:
      containers:
      - name: nginx
        image: nginx:alpine
        ports:
        - containerPort: 80
Run the following command to deploy it:
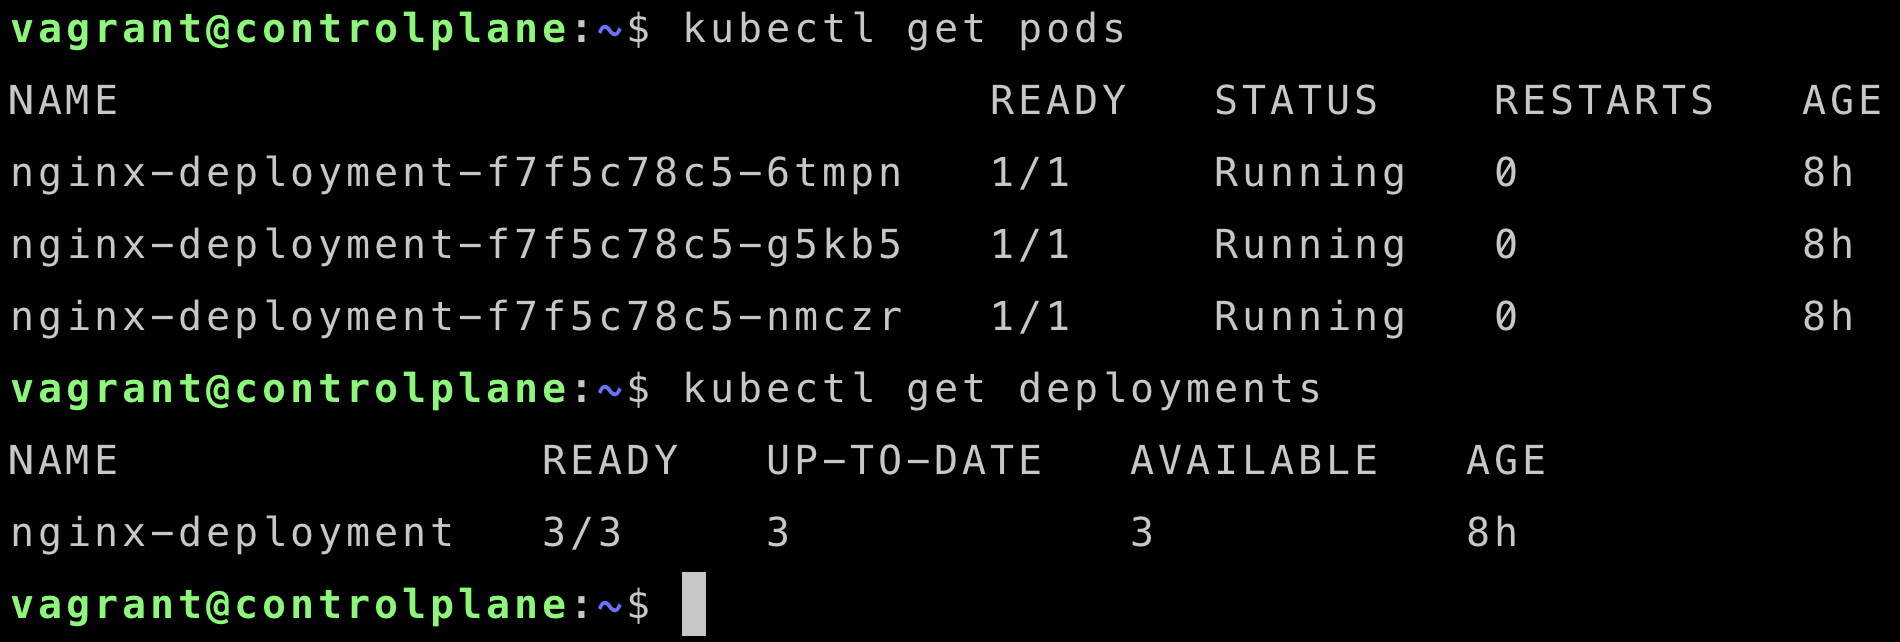
kubectl apply -f nginx-deployment.yamlYou can verify that the deployment is running by running the following command:
kubectl get pods
kubectl get deployments
you should see a similar output as shown bellow:

to access the application, you can expose the deployment using a service:
kubectl expose deployment nginx-deployment --type=NodePort --port=80you can get the port that the service is exposed on by running the following command:
kubectl get svcor you can use the following command to get the port only:
PORT_NUMBER=$(kubectl get service -l app=nginx -o jsonpath="{.items[0].spec.ports[0].nodePort}")
echo -e "\n\nService exposed on NodePort: $PORT_NUMBER"
Now you can access the application by using the IP address of any of the worker nodes and the port number that you got from the previous command.
in my case, i will use the IP address of node02 (192.168.11.104) as shown bellow (you can use any of the worker nodes IP addresses):
curl 192.168.11.104:30474
Conclusion:
In this guide, we have successfully set up a multi-node Kubernetes cluster using Kubeadm. We have also deployed a sample application to test the cluster.
If you have any questions or feedback, feel free to reach out to me. Happy Kuberneting!